Category Archives: ~ pop culture

On this Day … Moby Dick Published


On this day in 1851, Moby-Dick, a novel by Herman Melville about the voyage of the whaling ship Pequod, is published by Harper & Brothers in New York. Moby-Dick is now considered a great classic of American literature and contains one of the most famous opening lines in fiction: “Call me Ishmael.” Initially, though, the book about Captain Ahab and his quest for a giant white whale was a flop.

Herman Melville was born in New York City in 1819 and as a young man spent time in the merchant marines, the U.S. Navy and on a whaling ship in the South Seas. In 1846, he published his first novel, Typee, a romantic adventure based on his experiences in Polynesia. The book was a success and a sequel, Omoo, was published in 1847. Three more novels followed, with mixed critical and commercial results. Melville’s sixth book, Moby-Dick, was first published in October 1851 in London, in three volumes titled The Whale, and then in the U.S. a month later. Melville had promised his publisher an adventure story similar to his popular earlier works, but instead, Moby-Dick was a tragic epic, influenced in part by Melville’s friend and Pittsfield, Massachusetts, neighbor, Nathaniel Hawthorne, whose novels include The Scarlet Letter.

After Moby-Dick‘s disappointing reception, Melville continued to produce novels, short stories (Bartleby) and poetry, but writing wasn’t paying the bills so in 1865 he returned to New York to work as a customs inspector, a job he held for 20 years.

Melville died in 1891, largely forgotten by the literary world. By the 1920s, scholars had rediscovered his work, particularly Moby-Dick, which would eventually become a staple of high school reading lists across the United States. Billy Budd, Melville’s final novel, was published in 1924, 33 years after his death.

history.com

8 Cleaning Mistakes You’re Probably Making


From faulty dusting to defective dishwashing, common blunders can muck up even your best efforts. Use these pros’ smart suggestions over the holidays and every day to save you time and trouble.

1. Placing all utensils in the dishwasher facing the same direction.
It’s fine for all the forks to point up. (This prevents the tines from bending.) But when spoons sit in one direction in a standard dishwasher basket, they end up, well, spooning, which prevents a complete clean. Place some up and some down for a more thorough, even wash, and do the same with knives.

2. Washing windows on a sunny day.
Glass cleaner dries up much more quickly in direct sunlight, resulting in streaks on window panes. That’s why, in any season, the ideal time to clean windows is late afternoon or evening, or when the skies are overcast (and the temperature is below 70 degrees Fahrenheit). For quicker drying, swap your microfiber cloth for a window squeegee, which covers more surface area with each swipe.

3. Spraying cleaner directly on a surface.
This method is OK once in a while but should be reserved for extremely dirty surfaces that need extra solution. This shouldn’t be an everyday practice, because it will probably leave residue behind (for example, a gummy buildup on wood furniture and drip marks on walls). Instead, spray the formula onto a microfiber cloth. Wipe-downs done this way require less solution, which cuts down on buildup. (Your bottles of cleaner will last longer, too.)

4. Cleaning bare-handed (even for a quickie sink scrub-down).
Your skin is super-absorbent and will soak up almost any substance that touches its surface. Even natural products can dry out hands lickety-split. Avoid chalky rubber or latex gloves. Instead, choose gloves with a lined cotton interior (try these). They offer more of a protective barrier and are so comfortable, you’ll be motivated to put them on.

5. Treating liquid stains on a carpet superficially.
Scrubbing stains like pet urine, red wine, and coffee isn’t effective in the long term. Unless you remove fresh carpet spills at the deepest level, in time they may resurface. Try this method: As soon as you notice the spill, use a dry towel to sop up as much liquid as possible. Next, douse the spot with club soda or ice water and blot again with another dry towel. Step on the towel to absorb the liquid. Repeat the blotting until no more color is transferred to the towel. If the stain persists, apply a stain remover and repeat the process.

6. Putting a rinsed toilet brush right back in the holder.
Moisture breeds bacteria, so it’s important to let the brush dry completely before stashing it. Sandwich the handle between the toilet seat and the base, with the business end suspended over the bowl, to drip-dry. Leave it for at least 10 minutes or until fully dry, then return it to the holder.

7. Considering a rinsed sponge clean.
Because food and bacteria hide in a sponge’s crevices, a water rinse isn’t enough. So once or twice a week, toss sponges into the top rack of the dishwasher, or heat wet ones in the microwave for two minutes. Another option: Use a sponge sanitizer. During the holidays, when cooking activities ramp up, it’s best to clean sponges daily.

8. Vacuuming pet fur without an attachment.
Standard vacuuming on a wood or tile floor often blows away as much fur as it collects, so you’re essentially moving debris all over the room. For controlled suction, resulting in fewer fur flyaways, use the wand attachment. And before you vacuum, do a little prep work: Collect any visible fur into a pile with a broom or an electrostatic dry mop (like a Swiffer).

Thanks to our masters of maintenance:
Linda Cobb, cleaning pro based in Phoenix and creator of the Queen of Clean book series
Laura Dellutri, cleaning pro based in Overland Park, Kansas, and author of Speed Cleaning 101
Donna Smallin, cleaning pro based in Madison, South Dakota, and author of Clear the Clutter, Find Happiness (due out mid-December)

Fashion tips … Handbags


7 Tricks to Ensure Your Handbags Will Last for Years

By Allyson Payer

We’re more willing to splurge on a beautiful designer handbag than on any other wardrobe component, justifying our purchase by saying, “Well, this’ll last me for years,” which brings us to today’s subject: learning how to preserve and properly care for these investment items. Luckily, there are a few simple steps you can take to ensure that your precious satchels are kept in mint condition for years to come.

Scroll down to see our tips, and to shop gorgeous investment bags that you’ll want to protect!

1. Protect The Material:7 Tricks to Ensure Your Handbags Will Last for YearsThe Blonde Salad

Want to shield your new bag from spills and dirt before they happen? Scotchgard Fabric will do the trick for fabric panels, while Scotchgard Suede and Nubuck is a great water and oil repellant for suede. Both Collonil and Chamberlain’s make great leather-protecting products. Apply product with a clean white cotton cloth, followed by a dry cotton cloth to buff. Use products regularly on heavily used bags. With any products, test a small patch on the bag to make sure it doesn’t cause discoloration.

image

Collonil Leather Gel

image

Chamberlain’s Leather Milk

2. Store Them Properly:

image

Le 21eme

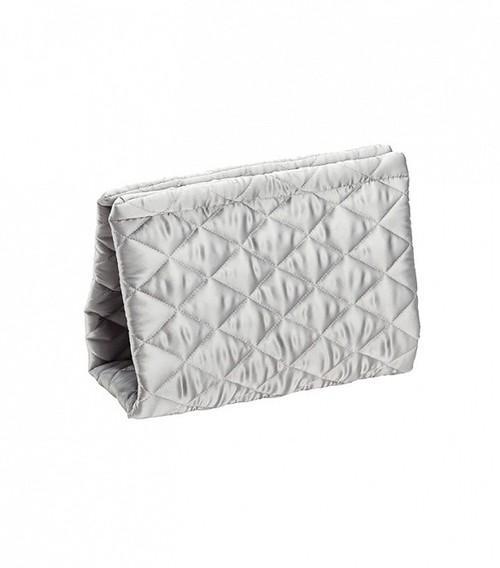
Do your bags get tossed onto a haphazard heap at the bottom of your closet? They’ll last longer if stored the right way, ideally in an upright position in their dust bags or a cotton pillowcase. Never store them in plastic or vinyl, which traps moisture inside. Stuff your bags with scarves, sweaters, or acid-free tissue paper, or use a handbag insert made for this purpose. Cross the handles over each other to avoid wear on the bag and unclip any removable straps for long-term storage.

Related: The ONE Mistake Every Handbag Owner Makes

image

The Container Store Quilted Handbag Shapers

image

The Container Store Linen Handbag Storage Bin

3. Remove Stains the Right Way:

image

Athens Streetstyle

The first step is to know what type of stain you’re dealing with, as that will dictate the removal method. See specific techniques below!

Food stains: Crush white chalk and let it sit on the stain overnight. Brush off with a clean cloth in the morning.

Oil stains: Put cornstarch on the stain immediately, rubbing it in to create heat from friction, which will help the oil absorb. Brush the powder off with a clean cloth after you’ve rubbed it in—don’t let it sit on the stain.

Ink stains: If the stain is fresh, use a white eraser to immediately erase the spot, without applying too much pressure so that the color doesn’t come off. If the ink is already set, you’ll need a professional (see tip #7). An eraser also works for dirt stains.

Water stains: Blot water stains, let them dry naturally, and bring your bag to a professional for removal.

Odor removal: Keep a plastic bag filled with baking soda inside your handbag. Zip the handbag or place it in a larger bag that seals if it doesn’t zip. Keep the baking soda in the bag for one or two days to absorb the odor. Another option? Place a couple of dryer sheets in the bag for a few days.

Related: Heavy Purse? 5 Smart Ways to Lighten Your Load

4. Protect the Lining: 

image

A Love is Blind

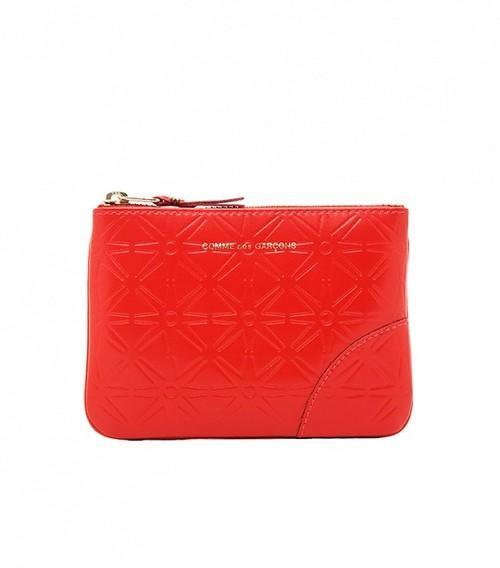
Use pouches to store cosmetics and liquids, which will protect the handbag lining from spills and keep you organized to boot. Avoid click pens at all cost, opting for pens with caps instead. Better yet, put those in your pouch too, in case of dreaded ink leaks.

image

Comme des Garçons Star Embossed Small Pouch

5. Keep Metal Hardware Shiny:

image

A Love is Blind

Do your best to keep away jewelry and zippers that could scratch your bag’s metal hardware. A go-to household item, Mr. Clean’s Magic Erasers, do a great job of cleaning up tarnished and grimy hardware.

Related: 14 Items Every Woman Should Have In Her Purse

6. Practice Routine Maintenance: 

image

Athens Streetstyle

Here are a few best practices when it comes to daily handbag maintenance:

1. Avoid handling your bag if your hands are dirty or have lotion or cream on them.
2. Keep your bag out of direct sunlight.
3. Rotate which handbag you carry regularly so that they don’t wear out too quickly.
4. Use a suede brush to clean and revive suede.
5. Regular use of a leather moisturizer will keep the leather supple and free of cracks.
6. Wipe your bag down on a weekly basis (when in use) with a soft cloth.

7. Take It to a Professional:

image


A Love is Blind

For stains and wear and tear beyond your handbag maintenance skill set, take it to a handbag repair professional. Most shoe repair professionals also work on handbags. They’ll treat it for you, clean it, and restore color as needed. If your bag doesn’t have metal feet on the bottom, it’s wise to have those installed, as they’ll protect it from scratches and dirt.

Related: Your Ultimate Guide to Fall’s Must-Have It-Bags

Shop Investment Handbags:

image

A.P.C. Edith Leather Shoulder Bag

A structured black bag will take you from day to night. Bonus points for sleek gold hardware.

image

Chloe Large Drew Grained Leather Shoulder Bag

All the cool girls are wearing this It-bag with a cool yet classic vibe.

Related: Is THIS The New It-Bag for Fall?

image

M2Malletier Memento Mori Bag

This slightly larger version of M2Malletier’s popular clutch style is perfect for everyday wear.

image

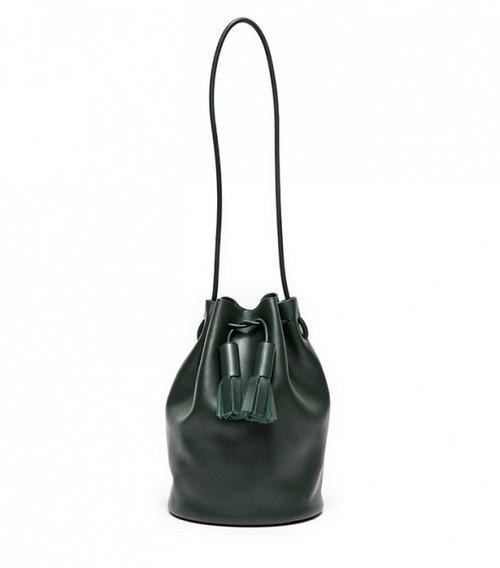
Building Block Bucket Bag

Buttery forest green leather and oversized tassels join forces to create a perfectly quirky bucket bag for fall.

image

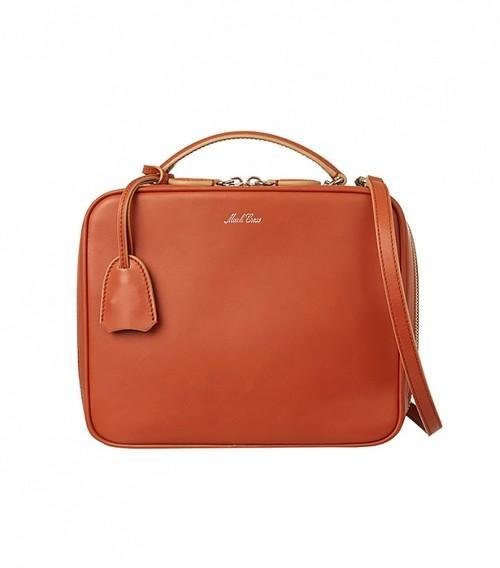
Mark Cross Laura Leather Shoulder Bag

Boxy shapes are in for fall, so tap into the trend with this structured Mark Cross version.

image

Rag & Bone Haircalf Bradbury Small Flap Hobo

This leopard calf-hair bag makes a subtle statement and gives a luxe feel to any outfit.

Superb Kenya Food Dishes around Kenya


Posted on: December 5th, 2013 by hujamboafrica

a reblog … http://wp.me/p3KT1t-iD

Kenya-food-dishIII

Although Kenya has a high influence and is highly recognized worldwide as a great African Safari destination the country is also immersed with superb and delicious, Kenya food dishes that would leave anyone craving for some more. Most of these Kenya food dishes have been adopted from different Kenya communities around the country.

By far, the locals have further sharpened their culinary skills astonishingly in order to produce the most finger-licking dishes from the former, Kenya food cuisines. Below is a short summary of the most top Kenya food dishes that worth a trial while in Kenya, either on Holiday or vacation.

Ugali and Fish – This is a superb dish that’s loved by many people across Kenya Its preparation is rather easy and takes just a few minutes to be served. Ugali is prepared from a mixture of maize flour and water, simply mix the flour in boiled water until it hardens, the end result should be like form of a cake when it’s fully ready. The fish is simply fried fish in Kenya is commonly found in Nyanza because it’s near Lake Victoria and at the Coast because it’s near the Indian Ocean. Likewise, this Kenya food dish should be served when hot also some kachumbari is usually served alongside this dish in order to, further nourish the dish’s taste.

Githeri – This Kenya food dish comprises of a mixture of both maize and beans, and it’s a superb delicious meal especially when added some meat or avocado. This usually makes the dish tender and also makes its taste a craving one, nevertheless. Also worth knowing, this is a popular dish among the Kikuyu people mostly found in Central Province, in Kenya.

Mukimo – This dish is somehow similar to Githeri Kenya food dish, though the dish is usually mashed all together. It comprises of maize and beans mashed together with either, potatoes or crooked bananas. Because this dish can alleviate hunger to a wide range of people it’s found fit to be served in many occasions like weddings and party’s, around Kenya. Rice and meat soup are most of the time added onto the dish in order to tenderize the dish and further nourish, its taste.

Kenya-food-dish

Mursik – This is a Kenya food drink which is normally prepared from a cow’s milk fermented in ash-treated gourds. Blood, on the other hand, may be added to fresh milk before fermentation or after the milk has already been fermented. Afterwards, the milk is heated to boiling point then cooled to a moderate temperature level. At this stage, the milk should be allowed to undergo spontaneous fermentation for a period of about 3-5 days before it’s ready, for consumption. Also worth knowing, this Kenya food drink is a popular food among the Kalenjins African culture people found, in Kenya.

Ingoho (Chicken) – Ingoho is a cultural Luhya name for chicken, in a great way the Luhya people from Western Kenya is deemed to love this dish, immensely. Likewise, if you happen to visit the place from either abroad or as a high prominent guest like a government official, the Luhya people will look forward to preparing you a superb Ingoho, of a kind.

Wali – Wali is a cultural Swahili name for rice it’s  the most popular Kenya food dish, among the Swahili people at the coast. For this particular dish to, further nourish its taste it’s normally added and cooked together with some coconut milk. Sure, the coconut milk works like magic and by far gives this dish an irresistible delicious, taste. Coconuts are also abundant at the Kenya’s coast, so the Swahili people can easily find them.

Kachumbari – This is another superb Kenya food dish loved by many people across the country. The dish comprises of a mixture of chopped tomatoes, onions, pepper, parsley and sometimes some avocado. Indeed, it’s quite a finger licking delicious dish that’s mostly served with Nyamachoma.

Nyama Choma – This is a superb Kenya food dish that’s widely consumed by a great mass of people in Kenya it’s, simply roast meat, which can be of different variety like Beef, chicken or fish. Beef, on the other hand, is widely available in many parts of the country and is also cheap compared to other types of animal meat around Kenya. More likely you’ll find this dish heavily consumed at parties, bars and restaurant – You ought to try some while in, Kenya.

Chapati – Chapati is another superb Kenya food dish loved by many people in Kenya, especially the teens and youths. The dish is made from wheat flour, which is shaped into small pieces of dough, rolled out into round flat discs and eventually, spread and fried on a pan. The dish is hugely delicious, and most times it’s served with meat stew in order to make it tender. Also worth knowing, you’ll find this dish prepared in many great occasions in Kenya, like family get together parties, weddings and much more.


Above are some of the superb and most consumed Kenya food dishes you’ll most likely find in Kenya, sure they’re immensely and fragrantly delicious, you’ll definitely crave more for another plate. More likely, if you’re a foodie junkie, you should really try some of these great dishes while in Kenya. Happy Travel!

Barbecue – History of Barbecue


Image result for Ellsworth B. A. Zwoyer of Pennsylvania patented a design for charcoal briquettes in 189 To barbecue means to slow-cook meat at a low temperature.

Zwoyer’s Design Patent #D27483 – charcoal briquette.


To barbecue means to slow-cook meat at a low temperature for a long time over wood or charcoal. In America, barbecue (or BBQ) originated in the late 1800’s during Western cattle drives. The cowboys were fed the less than perfect cuts of meat, often brisket, a tough and stringy piece of meat that required five to seven hours of cooking to tenderize. Other barbecue meats used were pork butt, pork ribs, beef ribs, venison and goat.

However, barbecue was not invented in America and no one knows who invented the barbecue. The word ‘Barbecue’ might come from the Taino Indian word ‘barbacoa’ meaning meat-smoking apparatus. ‘Barbecue’ could have also originated from the French word “Barbe a queue” which means “whiskers-to-tail.”

No one is sure of the correct origins of the word.

Who Invented the Charcoal Briquette?

Ellsworth B. A. Zwoyer of Pennsylvania patented a design for charcoal briquettes in 1897. (See the image to the right) After World War One, the Zwoyer Fuel Company built charcoal briquette manufacturing plants in the United States with plants in Buffalo, NY and Fall River, MA.

There are stories circulating that Henry Ford invented the very first briquette in 1920 with the help of Thomas Edison. However, the 1897 patent obviously predates this and Ford and Edison both knew Zwoyer.

Ford is the man who popularized the gas-powered car in America and invented the assembly line for automobile manufacturing. Ford created a briquette from the wood scraps and sawdust from his car factory.

E.G. Kingsford bought Ford’s briquette and placed it into commercial production.